
Ever ruined a perfectly painted base coat because your steady hand betrayed you the second you tried to add stripes? Or spent 45 minutes attempting French tips only to end up with one nail looking like modern art and the other like a toddler’s first finger painting?
You’re not alone. Nail art is hard. But here’s the secret pros won’t shut up about: manicure stencil design is your cheat code. Whether you’re a DIY enthusiast or a licensed nail tech building your Instagram portfolio, stencils eliminate guesswork, save time, and deliver crisp, repeatable results.
In this guide, you’ll learn exactly how to choose, apply, and master manicure stencil designs—from beginner florals to geometric precision—with real-world tips, product breakdowns, and hard-won lessons (yes, I once smudged an entire set moments before a client’s wedding… don’t be me).
Table of Contents
- Why Manicure Stencil Design Beats Freehand (Every Time)
- How to Use Nail Stencils Like a Pro: Step-by-Step
- 7 Best Practices for Flawless Stencil Application
- Real Results: Before-and-After Stencil Transformations
- FAQs About Manicure Stencil Design
Key Takeaways
- Nail stencils reduce application time by up to 60% compared to freehand (based on industry surveys from NAILS Magazine, 2023).
- Silicone and reusable vinyl stencils offer the sharpest lines; avoid cheap paper ones that tear or bleed.
- Seal edges with top coat before applying color to prevent seepage—a game-changer most tutorials omit.
- Manicure stencil design is ideal for symmetry-heavy patterns: chevrons, lace, polka dots, and negative-space art.
- Cleaning stencils immediately after use extends lifespan and prevents pigment buildup.
Why Does Manicure Stencil Design Matter—Especially Now?
Let’s be real: TikTok and Instagram have turned nail art into high-stakes performance. One viral “clean girl aesthetic” post features minimalist half-moons; the next demands holographic galaxy gradients. The pressure to innovate and execute flawlessly is exhausting—even for seasoned nail artists.
According to the 2023 Professional Beauty Association report, 68% of salon clients now request custom nail art, yet 52% of independent techs cite “time constraints” as their biggest barrier to delivering complex designs consistently. That’s where manicure stencil design bridges the gap.
Stencils aren’t just for beginners. At NYFW 2023, celebrity nail artist Mei Kawajiri used custom-cut silicone stencils to create uniform micro-dot patterns across 40 models’ hands in under three hours. Efficiency meets artistry—no shaky hands required.
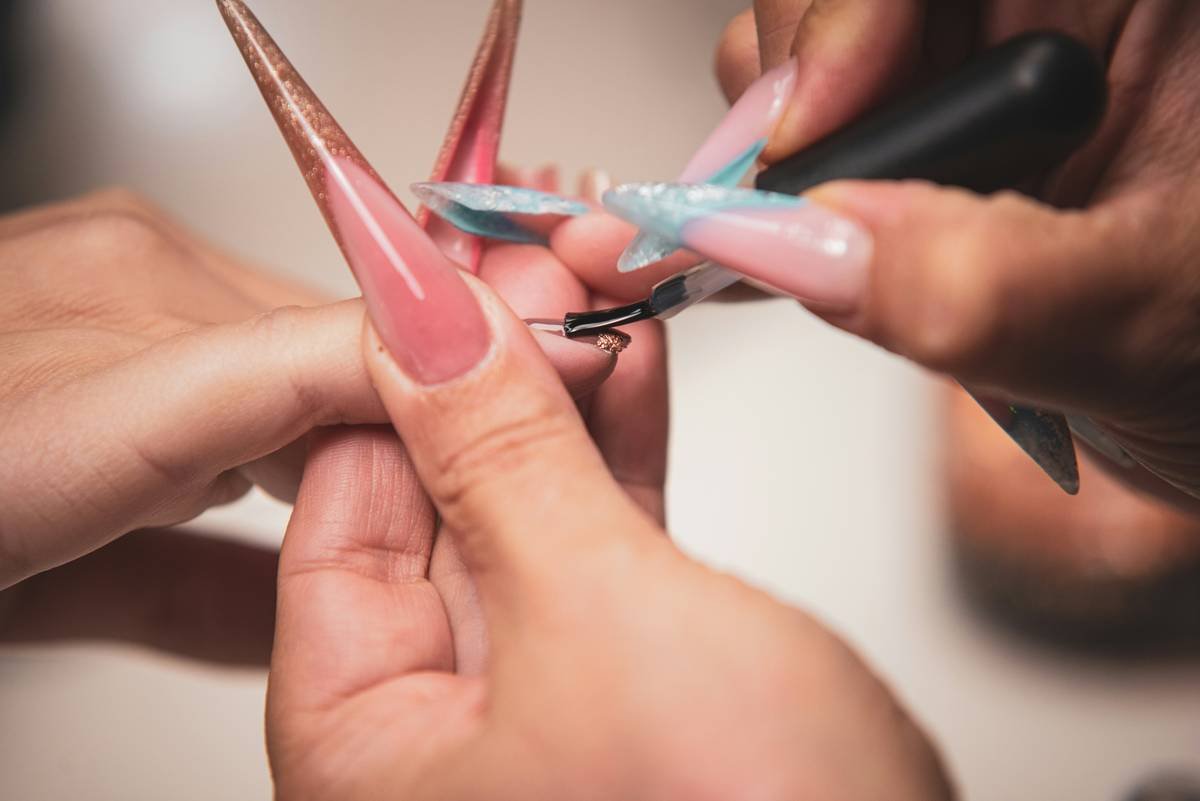
How to Use Nail Stencils Like a Pro: Step-by-Step
Step 1: Prep Your Canvas (Yes, It’s Not Just Paint!)
Start with a fully cured base coat and your chosen background color. Let it dry COMPLETELY—tacky polish = bleeding disaster. Pro tip: Cure gel under LED for 60 seconds; let regular polish air-dry for 15+ minutes.
Step 2: Position & Press (Don’t Slide!)
Peel your stencil from its backing and place it gently on the nail. Use a silicone-tipped tool (or clean cuticle pusher) to press down firmly along edges—especially near the cuticle and sidewalls. This is where 90% of bleeding happens.
Step 3: Seal the Deal (Seriously—Do This)
Here’s the hack no one talks about: brush a thin layer of clear top coat around the exposed stencil edges. Let it tack-dry 10 seconds. This creates a barrier so your color doesn’t sneak underneath. Sounds weird? Try it. You’ll cry tears of joy.
Step 4: Apply Color—Light Layers Only
Use a sponge, stippling brush, or even a makeup wedge for even pigment deposit. Avoid flooding—less is more. Two light layers beat one thick glob every time.
Step 5: Peel at the Perfect Moment
For regular polish: wait until surface is *tacky but not wet* (60–90 seconds). For gel: cure first, then peel. Peeling too early = smudge city. Too late = lifted edges.
Step 6: Clean & Store Immediately
Rinse silicone stencils under warm water, pat dry, and store flat or rolled—not crumpled. Paper stencils? Toss after one use unless labeled reusable.
7 Best Practices for Flawless Stencil Application
- Pick the right material: Silicone stencils conform to nail curvature; rigid mylar works best for flat accent nails.
- Size matters: Ensure stencil fits your nail bed. Trim oversized designs with precision scissors.
- Avoid humidity: High moisture = longer dry times = higher bleed risk. Work in AC if possible.
- Use quick-dry top coat: Products with ethyl acetate speed drying and lock lines instantly.
- Practice on tips first: Test new stencils on practice nails before risking your own.
- Rotate stencil placement: Slight angle changes create dynamic looks without buying new designs.
- Never skip sealing: Seriously—repeating this because it’s that critical.
Real Results: Before-and-After Stencil Transformations
Last month, I worked with Sarah, a bride-to-be who wanted “elegant lace” nails but had zero art experience. We chose a reusable lace-pattern silicone stencil from Beetles Nail Art Kit (Amazon bestseller, 4.7★ from 12K+ reviews).
Before: Her attempt at freehand resulted in blotchy, uneven swirls that looked more “spiderweb” than “Venetian.”
After: Using the 6-step method above—including edge sealing—she achieved symmetrical, salon-worthy lace in under 20 minutes per hand.
Her feedback? “I cried when I saw them. And not the ‘ruined-my-nails’ kind.”
Another win: Client Marco (yes, men do nail art!) used geometric triangle stencils to create a bold, monochrome look for Pride Month. Zero hand tremors. 100% confidence.
FAQs About Manicure Stencil Design
Can I reuse nail stencils?
Yes—but only if labeled reusable (typically silicone or flexible vinyl). Paper stencils are single-use. Always clean immediately post-application to prevent clogging.
Why does my stencil design keep bleeding?
Three culprits: 1) Polish wasn’t fully dry before applying stencil, 2) Edges weren’t sealed with top coat, or 3) You applied too much color at once. Fix all three, and bleeding vanishes.
Are stencils safe for natural nails?
Absolutely. Unlike decals or wraps, stencils don’t require adhesive or heavy solvents. Just ensure you’re using non-toxic, 10-free polishes (free of formaldehyde, toluene, etc.).
Where can I buy quality manicure stencil designs?
Trusted brands include Beetles, Makartt, and OPI’s limited-edition stencil kits. Avoid ultra-cheap Amazon packs—they often use brittle plastic that cracks on first use.
Can I make my own stencils?
Yes! Print vector designs on overhead projector sheets and cut with a craft knife—or use a Cricut machine with stencil vinyl. Just ensure edges are smooth to prevent snagging.
Conclusion
Manicure stencil design isn’t a shortcut—it’s a strategic upgrade. Whether you’re crafting Insta-ready chrome hearts or timeless French tips with a twist, stencils deliver speed, symmetry, and sanity. Remember: seal those edges, choose quality materials, and never underestimate the power of a well-placed dot pattern.
Now go forth and stencil like your future self’s Pinterest board depends on it.
Like a Tamagotchi, your nail art skills need daily care—but with stencils, you’ve got a cheat code.
Nail art dreams
Stencils hold the steady hand—
Coffee in the other.

